Both pages and posts follow some similar structures and features. Here we will take a look at some of these similarities. On the next page we’ll look at differences.
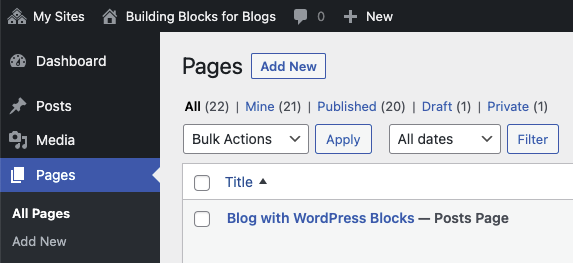
Finding or adding a page or post.
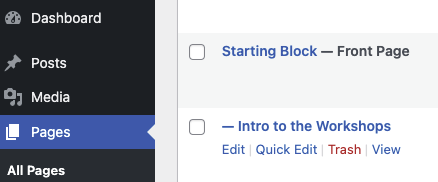
From your dashboard, select either posts or pages, or ADD NEW to create a new page or post. The page/post will open with the block editor set to the block where you add the title. Once you have worked on your page or post, you can either save as a draft, preview or publish. When you save as a draft, it will appear in the top directory (just below the topic Posts or Pages) where you can access all your drafts at the same time.
Draft or published
Your page or post is saved automatically or you can click the SAVE DRAFT to make sure your work is saved.
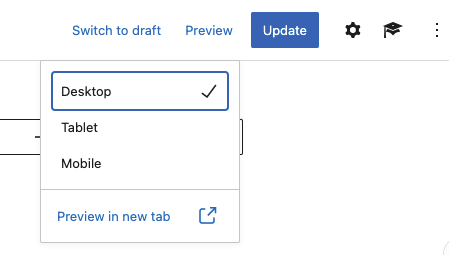
You can PREVIEW your page or post as it would appear on mobile, tablet or desktop computers.
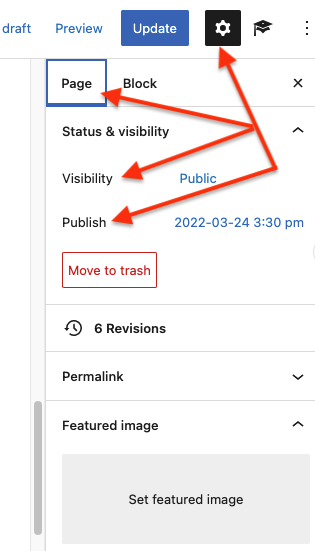
You can revert to a previously saved version of your page by clicking on the SWITCH to DRAFT link that appears in the top right corner when in pages or posts.
Publishing
When you are ready to publish your page or post, there are options available. You can schedule a page or post for publication at some time in the future or back-date as needed.
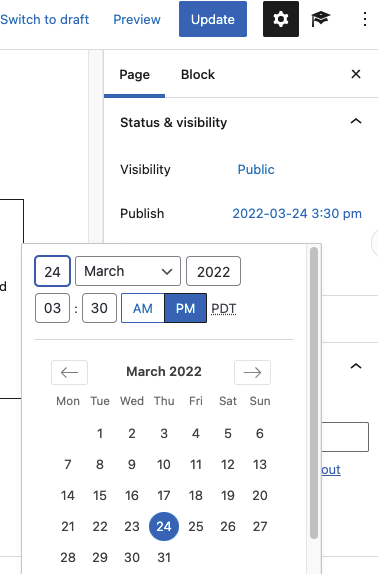
Selecting options for publishing.
Scheduling or changing publication dates and times.
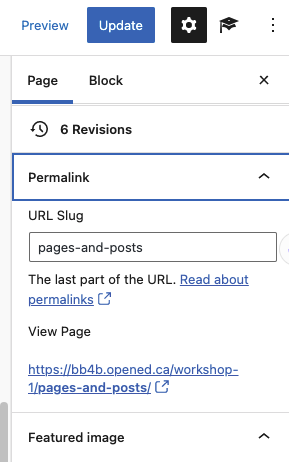
Working with the permalink for the page or post. Another way to view the published site (page or post) in a new browser window.
Edits and quick edits
From your dashboard, you can select EDIT to work with full edits on the page or post content. Once the edits are done, you need to click UPDATE in the top right corner. From your dashboard, you can select QUICK EDIT – these are related to the contextual information for the page or post such as date, publication status, or locations. For a page, you can check if you want to allow comments on your page. You can delete (TRASH) your page or post in this view on your dashboard.
The differences in QUICK EDITS between pages and posts will be explored on the next page.
Fonts and Text Options
You can change the overall site text features from the Appearance menu or within the block you are writing, using the settings gear, typography option. Highlight the text in a block, and select TYPOGRAPHY from the right side menu under the Gear Icon / Settings. Change from the default option to the one you wish to use. You can also change that colour of the text as needed, but keep in mind the colour contrasts needed for readability and accessibility, as outlined in the next section.
Colours and Images
On pages and in posts you can use the block editor to add a variety of media elements. We’ll look at basic changes to colours and inserting images. You’ll see these used throughout this blog site on both pages and posts.
First – adding colour. Be sure to check out the web accessibility issues when adding colour to the text and background on any web publishing, since this will impact user’s ability to engage with your content. Use the W3C A11y colour contrast accessibility validator tool to test for acceptable contrast ratios.
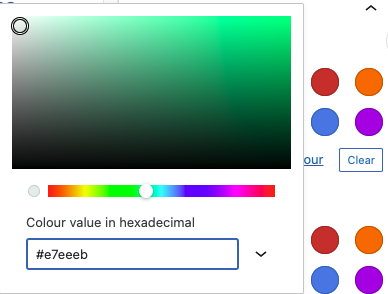
Learning the hex code to consistently apply colours to your blog site is helpful – the code for the colour you see in many of the blocks on this site is #e7eeeb (a variation of light grey green).
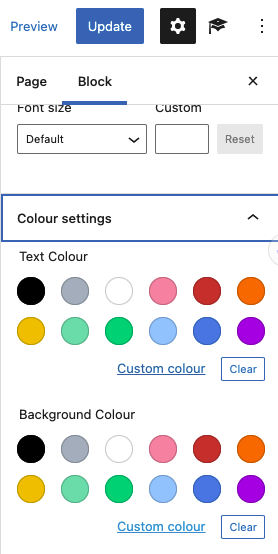
Under the settings (gear icon in top right corner) you can select COLOUR SETTINGS for a drop down menu of options for both text and backgrounds.
Selecting the background option, then clicking on CUSTOM will provide a drop down option for entering the hex code for any colour. If you want to play with colour a bit more, use one of these colour picker web sites to explore:
- HTML colour picker
- W3Schools colour picker
- ColorHex colours – also shows latest colour palettes
Additional resources on Web accessibility
- Easy Checks – A first review of web accessibility by W3C Web Accessibility Initiative
- Web Accessibility Evaluation Tools List by W3C (pay attention to the disclaimer notice)
- WAVE Web Accessibility Evaluation Tool – includes a video to guide you through the use of this tool.